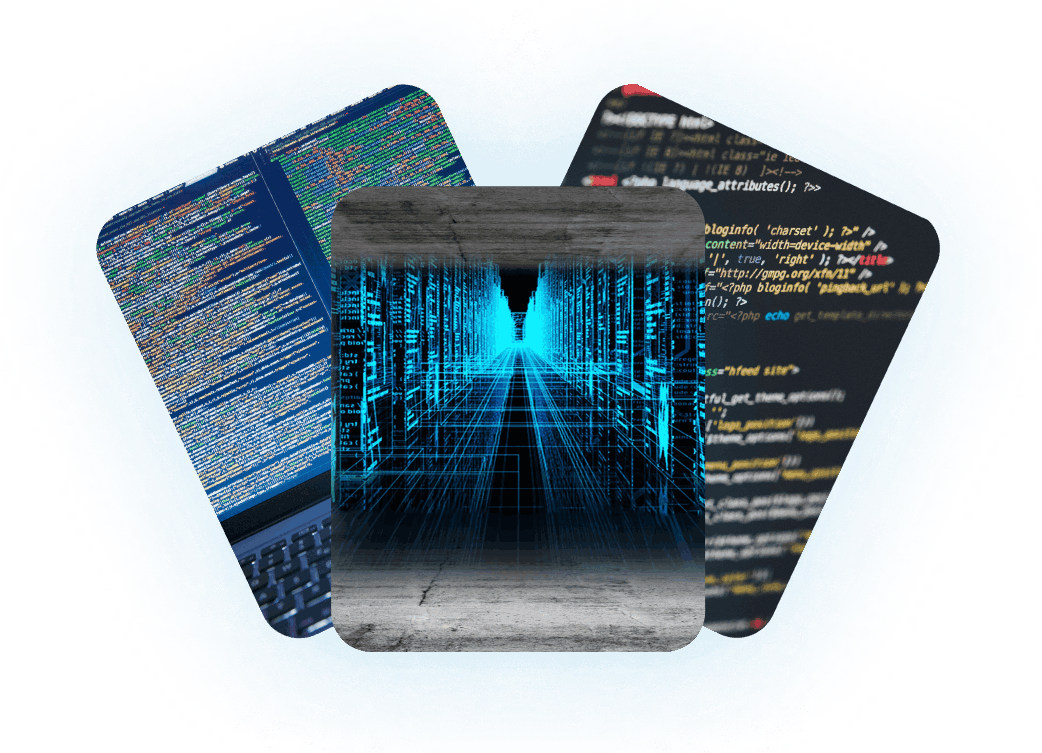
Table of Contents
In our last article, we continued work on our virtual workspace by installing and using Postman with Ryu’s REST API. This time, we are going to look at creating custom Mininet topologies by writing Mininet profiles in Python. Now that we are creating and modifying code and will need some additional project organization, we will start using Atom as our base editor and IDE. We are choosing Atom here because it’s expandable, contains all the features we need for developing OpenFlow controller applications, and is available for all major platforms. This article and future articles will show screenshots and videos with interacting with Atom as the editor, but you are more than welcome to use a different editor if you like.
We’ve also added an overview video for this article:
Atom Setup
Why Atom
For many coders, which editor or IDE we use is a very personal decision and is usually based on many factors, such as ease of use, features, and hackability. Through a console, several options are usually available, such as Vim, Nano, and even Emacs (if you’re in to that sort of thing ;-)). But if such a wonderful editor like Vim is available, why use Atom? Simply put, Atom takes advantage of newer web technologies and has lowered the barrier of entry for plugin developers, which has allowed for not only the basic highlighting of many programming languages, but also interfaces with linters, compilers, and debuggers. There are even plugins that allow different input modes, such as Vim-like keybindings. Further, Atom has deep integration with git and allows for better collaborative development. Personally, I switched from Vim to Atom for everyday use because it has nearly everything I want, and anything it doesn’t have is easy to code. We’ll be keeping in mind that not all our readers use Atom and will make sure no Atom-specific feature is required for following the guides, but we may show tips and tricks with Atom from time to time.
An Atom Setup video following along this section is also available:
Setting Up Atom
In our virtual workspace, installing Atom is almost exactly the same as installing Chrome or any other package in Ubuntu. Simply go to Atom.io, then download and install the package. As of this article, the latest release is version 1.8. For following along, we recommend installing the following packages:
- Python Development
autocomplete-python
– autocompletion powered by Jedilinter-pylint
– lint python using pylint, automatically installslinter
- General Development
script
– run code in atom
- Quality of Life, completely optional, but seen in screenshots
file-icons
– improved visual greppingminimap
– preview full source codeminimap-find-and-replace
– integration with find and replaceminimap-git-diff
– integration with git diffminimap-linter
– integration with linterminimap-selection
– show buffer’s selection on the minimapvim-mode
– vim modal controlex-mode
– Ex for vim-modehyperclick
– Ctrl+click Go-to-Definition forautocomplete-python
These can be installed by opening up the Settings tab by pressing Ctrl+,
or pressing Ctrl+Shift+P
and searching for Settings. Click on Install on the left side of the Settings tab, then search for each package in the list and click its Install button.
The only package that really needs configuration is autocomplete-python
and that is to make sure it can find Mininet’s definitions. In the Settings tab, click Packages on the left, and click the “Settings” button in the autocomplete-python
card. Scroll down to “Extra Paths for Packages” and enter the location where you cloned Mininet’s repository for manual installation back in Creating a Development Workspace. If you used the exact directories in that article, the location should be /home/<username>/ofworkspace/mininet
where <username>
is your username in the workspace.
Finally, the hyperclick
documentation states that the “highlight” and “perform action” keybindings are using the Alt
key. On Linux, it is actually using Ctrl
as Alt
is used to move windows. In any case, just Ctrl+click
a variable in a Python source file to go to its definition if hyperclick
is installed. Without hyperclick
, you can still use the go-to-definition feature by clicking on, or moving your cursor into, the variable name then pressing Ctrl+Alt+G
.
Poking Around Ryu and Mininet
If you are feeling adventurous, feel free to add Ryu’s and Mininet’s sources as project folders in Atom. To do this, click File -> Add Project Folder for each of these projects. If you followed the directions from Creating a Development Workspace, these folders should be in the ofworkspace
folder of your home folder. Alternatively, you can add project folders through the command line:
1 2 3 |
cd ~/ofworkspace atom -a ryu atom -a mininet |
If Atom was not already open, the first atom
command will start it. Further atom -a
commands will add the project folder to the most recently used Atom window.
When browsing files in Atom, the files will load in a Pending tab. If you do not make any changes to the current file, and then select a different file to view, the contents of the tab will be replaced rather than opening a new tab. This is generally useful when just browsing code, but if you want to keep the tab, right click the tab and click “Keep Pending Tab”. Editing the contents of the tab will automatically cause Atom to keep the tab and opening a new fill will open a new tab.
Defining Mininet Topologies
Now that we have an editor set up, let’s look at how Mininet Topologies are defined. From the previous examples, we’ve been running mininet using only command line options, like this:
1 2 3 4 |
# Run Mininet with a single switch and three hosts, automatically set host # MACs, use the Kernel-based Open vSwitch implementation, and have that # switch controlled by a remote OpenFlow controller sudo mn --topo single,3 --mac --switch ovs --controller remote |
This actually works pretty well for simple tests. There are even more complicated topologies that are built in to Mininet, including Tree and Torus. Let’s say we want a custom topology that might reflect a real-world network. Thankfully, Mininet provides a rich scripting environment that makes emulating custom topologies very simple.
We recommend following along below by typing in the code yourself. After all, you can often learn a lot more by making mistakes and fixing them than just running something from an archive! We also understand that sometimes you just don’t have time for that or may get stuck with a specific example. For this, we have an archive of all the files listed in this article, plus a test script to ensure each works properly.
Download Example Mininet Topologies
To use, simply extract the archive in your workspace:
1 2 |
cd ~/ofworkspace unzip ~/Downloads/mininet-topologies_0.1.0.zip |
Replace the filename in the unzip
command to the downloaded file location and version number.
Creating a Mininet Project
While experimenting with topologies, we will need a place to store the topology scripts. Let’s create a new directory under our workspace directory:
1 2 |
mkdir -p ~/ofworkspace/mininet-topologies cd ~/ofworkspace/mininet-topologies |
If you are using Atom, go ahead and add this as a project folder:
1 |
atom -a . |
Now on to our first topology.
Simple Topology Creation
Before getting into more advanced topologies, let’s create the simplest Mininet script that will allow us to apply a topology and give us a CLI prompt like the Mininet commands we’ve been running so far. Create a new file called ‘minimal.py’ in the Mininet Topologies project directory created above.
1 2 3 4 5 6 7 8 9 10 11 12 13 14 15 16 17 18 19 20 21 22 23 24 25 26 27 28 29 30 31 |
""" A simple minimal topology script for Mininet. Based in part on examples in the [Introduction to Mininet] page on the Mininet's project wiki. [Introduction to Mininet]: https://github.com/mininet/mininet/wiki/Introduction-to-Mininet#apilevels """ from mininet.topo import Topo class MinimalTopo( Topo ): "Minimal topology with a single switch and two hosts" def build( self ): # Create two hosts. h1 = self.addHost( 'h1' ) h2 = self.addHost( 'h2' ) # Create a switch s1 = self.addSwitch( 's1' ) # Add links between the switch and each host self.addLink( s1, h1 ) self.addLink( s1, h2 ) # Allows the file to be imported using `mn --custom <filename> --topo minimal` topos = { 'minimal': MinimalTopo } |
With this script, there are a couple options to run it. First, make sure Ryu is running in a separate terminal with the OF1.3 version of simple switch and optionally the REST API:
1 |
ryu-manager ryu.app.simple_switch_13 ryu.app.ofctl_rest |
The last line in the script provides a hook to the mn
command that allows it to be imported and the custom topology to be used:
1 |
sudo mn --custom minimal.py --topo minimal --mac --switch ovs --controller remote |
But what if we wanted a script to automatically set up the network with the options we’ve been providing the mn
command all this time? We can add a bit more to the script:
1 2 3 4 5 6 7 8 9 10 11 12 13 14 15 16 17 18 19 20 21 22 23 24 25 26 27 28 29 30 31 32 33 34 35 36 37 38 39 40 41 42 43 44 45 46 47 48 49 50 51 52 53 54 55 56 57 58 59 60 61 62 63 64 65 |
#!/usr/bin/python """ A simple minimal topology script for Mininet. Based in part on examples in the [Introduction to Mininet] page on the Mininet's project wiki. [Introduction to Mininet]: https://github.com/mininet/mininet/wiki/Introduction-to-Mininet#apilevels """ from mininet.cli import CLI from mininet.log import setLogLevel from mininet.net import Mininet from mininet.topo import Topo from mininet.node import RemoteController, OVSSwitch class MinimalTopo( Topo ): "Minimal topology with a single switch and two hosts" def build( self ): # Create two hosts. h1 = self.addHost( 'h1' ) h2 = self.addHost( 'h2' ) # Create a switch s1 = self.addSwitch( 's1' ) # Add links between the switch and each host self.addLink( s1, h1 ) self.addLink( s1, h2 ) def runMinimalTopo(): "Bootstrap a Mininet network using the Minimal Topology" # Create an instance of our topology topo = MinimalTopo() # Create a network based on the topology using OVS and controlled by # a remote controller. net = Mininet( topo=topo, controller=lambda name: RemoteController( name, ip='127.0.0.1' ), switch=OVSSwitch, autoSetMacs=True ) # Actually start the network net.start() # Drop the user in to a CLI so user can run commands. CLI( net ) # After the user exits the CLI, shutdown the network. net.stop() if __name__ == '__main__': # This runs if this file is executed directly setLogLevel( 'info' ) runMinimalTopo() # Allows the file to be imported using `mn --custom <filename> --topo minimal` topos = { 'minimal': MinimalTopo } |
The script can now be run directly and it will run the runSimpleTopo
function, which sets up the global network defaults for us:
1 2 |
chmod a+x ./minimal.py # Makes script executable, only needed once sudo ./minimal.py |
You can do a lot with scripting the creation of the Mininet network such as automated testing, automatically starting Ryu and more. For simplicity’s sake in this article, we will keep to the first form and use the mn
command. We will touch on automated environments in a future article.
If you typed the source for minimal.py
above, you may have noticed that many of the commands gave you auto-completion results and documentation on the functions specified. This is one of the reasons why having an integrated editor really helps when writing code not only for Mininet and Ryu, but other projects as well.
Also, remember that you can Ctrl+click (Alt+click on Windows) nearly any function or variable to jump to where it is defined, even if it is an imported library.
Building a Datacenter Topology
In this topology, we have four racks, each with four hosts and a single top-of-rack (ToR) switch. These ToR switches are connected to a central root switch. This represents a simple datacenter.
1 2 3 4 5 6 7 8 9 10 11 12 13 14 15 16 17 18 19 20 21 22 23 24 25 26 27 28 29 30 31 32 33 34 35 36 37 38 39 40 41 42 43 44 |
""" A simple datacenter topology script for Mininet. [ s1 ]================================. ,---' | | | [ s1r1 ]=. [ s1r2 ]=. [ s1r3 ]=. [ s1r4 ]=. [ h1r1 ]-| [ h1r2 ]-| [ h1r3 ]-| [ h1r4 ]-| [ h2r1 ]-| [ h2r2 ]-| [ h2r3 ]-| [ h2r4 ]-| [ h3r1 ]-| [ h3r2 ]-| [ h3r3 ]-| [ h3r4 ]-| [ h4r1 ]-' [ h4r2 ]-' [ h4r3 ]-' [ h4r4 ]-' """ from mininet.topo import Topo from mininet.util import irange class DatacenterBasicTopo( Topo ): "Datacenter topology with 4 hosts per rack, 4 racks, and a root switch" def build( self ): self.racks = [] rootSwitch = self.addSwitch( 's1' ) for i in irange( 1, 4 ): rack = self.buildRack( i ) self.racks.append( rack ) for switch in rack: self.addLink( rootSwitch, switch ) def buildRack( self, loc ): "Build a rack of hosts with a top-of-rack switch" dpid = ( loc * 16 ) + 1 switch = self.addSwitch( 's1r%s' % loc, dpid='%x' % dpid ) for n in irange( 1, 4 ): host = self.addHost( 'h%sr%s' % ( n, loc ) ) self.addLink( switch, host ) # Return list of top-of-rack switches for this rack return [switch] # Allows the file to be imported using `mn --custom <filename> --topo dcbasic` topos = { 'dcbasic': DatacenterBasicTopo } |
This topology isn’t all that different from a standard tree topology, but it does demonstrate how to write a topology that is closer to a real network. Ryu’s simple switch shouldn’t have any problem managing this either:
1 |
sudo mn --custom datacenterBasic.py --topo dcbasic --mac --switch ovs --controller remote |
In order to keep track of which host belongs to which rack, the names of the hosts and switches are customized. All switches still start with s#
, but is suffixed by the rack specified as r#
. the only switch that doesn’t have a rack suffix is the root switch. Additionally, the hosts are named similar so that h3r2
means host 3 on rack 2.
Making the Topology Configurable
Our previous topology is a bit too rigid and static. Let’s add the ability to specify how many hosts we want in each rack and how many racks in our network straight from the command line.
1 2 3 4 5 6 7 8 9 10 11 12 13 14 15 16 17 18 19 20 21 22 23 24 25 26 27 28 29 30 31 32 33 34 35 36 37 38 39 40 41 42 43 44 |
""" A simple datacenter topology script for Mininet. [ s1 ]================================. ,---' | | [ s1r1 ]=. [ s1r2 ]=. ... [ s1r# ]=. [ h1r1 ]-| [ h1r2 ]-| ... [ h1r# ]-| [ h2r1 ]-| [ h2r2 ]-| ... [ h2r# ]-| ... | ... | ... ... | [ h#r1 ]-' [ h#r2 ]-' ... [ h#r# ]-' """ from mininet.topo import Topo from mininet.util import irange class DatacenterConfigurableTopo( Topo ): "Configurable Datacenter Topology" def build( self, numRacks=4, numHostsPerRack=4 ): self.racks = [] rootSwitch = self.addSwitch( 's1' ) for i in irange( 1, numRacks ): rack = self.buildRack( i, numHostsPerRack=numHostsPerRack ) self.racks.append( rack ) for switch in rack: self.addLink( rootSwitch, switch ) def buildRack( self, loc, numHostsPerRack ): "Build a rack of hosts with a top-of-rack switch" dpid = ( loc * 16 ) + 1 switch = self.addSwitch( 's1r%s' % loc, dpid='%x' % dpid ) for n in irange( 1, numHostsPerRack ): host = self.addHost( 'h%sr%s' % ( n, loc ) ) self.addLink( switch, host ) # Return list of top-of-rack switches for this rack return [switch] # Allows the file to be imported using `mn --custom <filename> --topo dcconfig` topos = { 'dcconfig': DatacenterConfigurableTopo } |
1 |
sudo mn --custom datacenterConfigurable.py --topo dcconfig,2,8 --mac --switch ovs --controller remote |
The topology configuration is in the form of dsconfig,<numRacks>,<numHostsInRack>
and can be specified as just dsconfig
for the default of 4 and 4. You could also only specify the number of racks and use the default hosts-per-rack like dsconfig,6
(6 racks, 4 hosts per rack).
Adding Redundant Links
In a real datacenter, you will most often have more than one root switch linked in a ring pattern with at least two links going to each ToR switch. This allows for a failure of one of your root switches without bringing down your entire network. Implementing that is simple enough:
1 2 3 4 5 6 7 8 9 10 11 12 13 14 15 16 17 18 19 20 21 22 23 24 25 26 27 28 29 30 31 32 33 34 35 36 37 38 39 40 41 42 43 44 45 46 47 48 49 50 51 52 53 54 55 56 57 58 59 60 61 62 63 64 65 66 67 68 69 |
""" A simple datacenter topology script for Mininet. ,----------------------------. Each root switch connected in ring. [ s1 ]------[ s2 ]--- ... ---[ s# ] |,----------' | Each ToR switch connects to every ||,--------------------------' root switch. [ s1r1 ]=. [ s1r2 ]=. ... [ s1r# ]=. [ h1r1 ]-| [ h1r2 ]-| ... [ h1r# ]-| [ h2r1 ]-| [ h2r2 ]-| ... [ h2r# ]-| ... | ... | ... ... | [ h#r1 ]-' [ h#r2 ]-' ... [ h#r# ]-' """ from mininet.topo import Topo from mininet.util import irange class DatacenterHARootTopo( Topo ): "Configurable Datacenter Topology" def build( self, numRacks=4, numHostsPerRack=4, numHASwitches=2 ): # This configuration only supports 15 or less root switches if numHASwitches >= 16: raise Exception( "Please use less than 16 HA switches" ) self.racks = [] rootSwitches = [] lastRootSwitch = None # Create and link all the root switches for i in irange( 1, numHASwitches ): rootSwitch = self.addSwitch( 's%s' % i ) rootSwitches.append( rootSwitch ) # If we have initialized at least two switches, make sure to # connect them. This handles s1 -> s2 -> ... -> sN if lastRootSwitch: self.addLink( lastRootSwitch, rootSwitch ) lastRootSwitch = rootSwitch # Make the final link from the last switch to the first switch if numHASwitches > 1: self.addLink( lastRootSwitch, rootSwitches[0] ) for i in irange( 1, numRacks ): rack = self.buildRack( i, numHostsPerRack=numHostsPerRack ) self.racks.append( rack ) for switch in rack: for rootSwitch in rootSwitches: self.addLink( rootSwitch, switch ) def buildRack( self, loc, numHostsPerRack ): "Build a rack of hosts with a top-of-rack switch" dpid = ( loc * 16 ) + 1 switch = self.addSwitch( 's1r%s' % loc, dpid='%x' % dpid ) for n in irange( 1, numHostsPerRack ): host = self.addHost( 'h%sr%s' % ( n, loc ) ) self.addLink( switch, host ) # Return list of top-of-rack switches for this rack return [switch] # Allows the file to be imported using `mn --custom <filename> --topo dcharoot` topos = { 'dcharoot': DatacenterHARootTopo } |
However, this does create a problem: loops. Just adding the topology now will cause the network to crumble because our simple switch doesn’t have any basic loop management such as STP. If you kept the original Ryu controller running, you may notice a flood of packets being reported. You may have to press Ctrl+C
repeatedly in order for it to stop.
1 |
sudo mn --custom datacenterHARoot.py --topo dcharoot --mac --switch ovs --controller remote |
Thankfully, Ryu includes a simple switch implementation with STP. Stop the existing Ryu controller and start a new one loading the ryu.app.simple_switch_stp
controller application. Note that this example STP switch app only supports OF 1.0, though the library it uses supports OF 1.0 and 1.3.
1 |
ryu-manager ryu.app.simple_switch_stp |
Then in the other terminal, run Mininet again with the same mn
command above. You will immediately see learning entries in the log. Running a pingall
right away may result in some packet loss before the entire topology is learned by the controller.
The first minute or so running the pingall
command will result in packet loss while the controller is learning the network topology. Eventually, the pingall
command will complete with no packet loss.
Full Redundancy
As a final addition to our datacenter topology, let’s configure it so that every rack has two ToR switches, each connected with a single link to the root switches and provide every host with a connection to both ToR switches in that rack.
1 2 3 4 5 6 7 8 9 10 11 12 13 14 15 16 17 18 19 20 21 22 23 24 25 26 27 28 29 30 31 32 33 34 35 36 37 38 39 40 41 42 43 44 45 46 47 48 49 50 51 52 53 54 55 56 57 58 59 60 61 62 63 64 65 66 67 68 69 70 71 72 73 74 75 76 77 78 79 80 81 82 83 84 |
""" A simple datacenter topology script for Mininet. ,----------------------------. Each root switch connected in ring. [ s1 ]------[ s2 ]--- ... ---[ s# ] | | | Each ToR switch connects to its ,==='==========='================' associated root switch. (s3r1 <-> s3) |-[ s1r1 ]=. [ s1r2 ]=. ... [ s1r# ]=. |-[ s2r1 ]=| [ s2r2 ]=| ... [ s2r# ]=| | ... | ... | ... ... | `-[ s#r1 ]=| [ s#r2 ]=| ... [ s#r# ]=| | | | [ h1r1 ]-| [ h1r2 ]-| ... [ h1r# ]-| [ h2r1 ]-| [ h2r2 ]-| ... [ h2r# ]-| ... | ... | ... ... | [ h#r1 ]-' [ h#r2 ]-' ... [ h#r# ]-' """ from mininet.topo import Topo from mininet.util import irange class DatacenterHAFullTopo( Topo ): "Configurable Datacenter Topology" def build( self, numRacks=4, numHostsPerRack=4, numHASwitches=2 ): # This configuration only supports 15 or less root switches if numHASwitches >= 16: raise Exception( "Please use less than 16 HA switches" ) self.racks = [] rootSwitches = [] lastRootSwitch = None # Create and link all the root switches for i in irange( 1, numHASwitches ): rootSwitch = self.addSwitch( 's%s' % i ) rootSwitches.append( rootSwitch ) # If we have initialized at least two switches, make sure to # connect them. This handles s1 -> s2 -> ... -> sN if lastRootSwitch: self.addLink( lastRootSwitch, rootSwitch ) lastRootSwitch = rootSwitch # Make the final link from the last switch to the first switch if numHASwitches > 1: self.addLink( lastRootSwitch, rootSwitches[0] ) for i in irange( 1, numRacks ): rack = self.buildRack( i, numHostsPerRack=numHostsPerRack, numHASwitches=numHASwitches ) self.racks.append( rack ) # For every HA switch, add a link between the rack switch and root # switch of the same ID for j in range( numHASwitches ): self.addLink( rootSwitches[j], rack[j] ) def buildRack( self, loc, numHostsPerRack, numHASwitches ): "Build a rack of hosts with a top-of-rack switch" switches = [] for n in irange( 1, numHASwitches ): # Make sure each switch gets a unique DPID based on the location # in the rack for easy decoding when looking at logs. dpid = ( loc * 16 ) + n switch = self.addSwitch( 's%sr%s' % (n, loc), dpid='%x' % dpid ) switches.append( switch ) for n in irange( 1, numHostsPerRack ): host = self.addHost( 'h%sr%s' % ( n, loc ) ) # Add a link from every top-of-rack switch to the host for switch in switches: self.addLink( switch, host ) # Return list of top-of-rack switches for this rack return switches # Allows the file to be imported using `mn --custom <filename> --topo dafull` topos = { 'dchafull': DatacenterHAFullTopo } |
Run the topology:
1 |
sudo mn --custom datacenterHAFull.py --topo dchafull --mac --switch ovs --controller remote |
After a few moments (look for FORWARD
log entries in Ryu), run the pingall
command and it should pass with no packet loss.
While we have pingall
passing here, it is important to note that we did not go into each host and configured some sort of link aggregation to actually prepare for a switch or link failure. This will be covered in future topics. This does demonstrate, however, that you can emulate nearly any network L2 topology fairly easily. In a real-world environment, STP is probably not the best protocol for HA networks and more advanced switch control would be needed in the controller or from the controller’s base libraries. For example, the ryu.app.simple_switch_stp
example app uses an STP library provided by Ryu’s internals.
Automated Testing
Included in the downloadable content for this article is the full source for all the examples above and an automated test script that will test each of those examples. It will even start and stop Ryu with the appropriate controller applications loaded! We’ll be touching more on automated testing with Mininet in a later article, but take a look at the datacenterTests.py
file for an example.
To run the tests, assuming you extracted the archive in ~/ofworkspace/
, run:
1 2 |
cd ~/ofworkspace/mininet-topologies sudo ./datacenterTests.py |
At the end, you should see all tests pass:
You may notice that a couple of the tests (specifically the ones using STP) drop some packets. This is normal and the test allows 15 packets to drop to accommodate the learning period required. Feel free to play around with the test code and see if you can make it so the ping test always passes with zero packet loss. It is possible! =)
We’ve hoped you enjoyed this topic and that you will visit us for the next in the series where we start building our own pluggable Ryu controller app. Make sure to sign up to our mailing list to be notified when these articles are published. Also, please feel free to ask questions and leave comments below. We are always welcome to feedback so we can provide the best content possible.
As always, Happy Coding! =)
It is our goal to create realistic Datacenter topologies that can be used in the development and functional testing of OpenFlow Controller Applications.
To get a feel for how the mininet datacenter examples presented in this article perform, I selected datacenterConfigurable.py to create range of small environments. I used a standard rack of 20 Hosts with 1 top-of-rack switch. All ToR switches connect to an aggregation switch (root switch).
I then ran five datacenters configurations ranging from 1 rack to 5 racks. So the largest is an environment of 5 Switches and 100 Hosts with 105 link. First I timed how long mininet took to create the environment.
So the time to build the environment is very quick. Even on a 5 year old quad core PC with 6 Gig of memory (2 Gig to VirtualBox).
Next I wanted to get some feel for operational performance. The easiest thing to try was a PingAll. Here are the results for each configuration
PingAll is a very flawed operations measure. It is clear just by watching the output that PingAll is sequential by Host level by Rack (try it and watch the output). So I don’t think we gain any insight on the performance of a 100 Host mininet environment.
However, I do think we see how critical it is to have the right Application algorithm.
For example, the current PingAll create a 100 x 99 star algorithm with learning being pushed across the datacenter. To complete this for 100 Host in 5 rack is 5 min and 17 seconds. This is almost 53 times longer that the 6 second to learn all mac address in a single rack.
So, I looks like a better algorithm is one that first does a PingAll with in a Rack. This would take about 30 seconds for a 5 Rack environment. Then do the PingAll across the full datacenter.
Or, enhance the “mac learning” so that when a new mac is seen all the switches are provided a rule. The ToR for the Host gets the final link, all other ToR switched get a rule sending the packet to the Aggregation Switch, and the Aggregation switch gets a rule sending to the ToR of the Host.
So, in conclusion, the performance data for mininet show that a realistic small datacenter can be built in a few seconds using just average PC capabilities.
This experiment also show that even a small datacenter model can expose issues within a Controller Application. And this model can provide an excellent environment for trying new algorithms to solve that issues.
I think we can use this case study to show that a topology aware simple_switch can perform much better in link discovery.
This is an extension of my first comment above. That commnet showed that a 100 Host virtual datacenter can be build using mininet in about 13 seconds.
What did get exposed was the poor performance of the simple_switch_13 “learning” algorithm. In moving from 4 racks (80 Hosts) to 5 racks (100 Host) the PingAll time doubled while the number of Hosts only increased by 20%. This is not a behavior that could support a large datacenter of say 2,000 Hosts.
To look a little closer at the underlying cause I enhanced simple_switch_13 to track and report the number of PackIn events it process over the course of completing the PingAll tack. This is presented in the table below.
So we see that it tacks over 61,000 pings to fully discover and populate the 100 Host over the 6 switches. This is a lot of pings to populate the total 10,402 rules across the 6 switches.
There has to be better SDN algorithms for this simple task. And, those are going to be explored in the next artcle “Simple_Switch 2.0”.
One more little experiment. I use the datacenterConfigurable.py script to build a virtual data center of 1,000 Host. The data center has 50 Racks of 20 Host each plus a ToR switch. There is 1 aggregation switch.
This 1,000 Host virtual environment only took 3 minutes and 27 second to build.
So it look like we can get some large scale functional tests.